Marbled Pumpkin Tutorial

It seems that each year something new and interesting pops up on pinterest for how to decorate this season’s pumpkins. Some families carve, other families paint, but this year the Guard for Life family used nail polish to decorate their pumpkins! Well, plastic pumpkins, but real or plastic it works both ways.
We decided to get creative and try a hand at marbling some pumpkins. Check out our easy tutorial on how to make your own marbled pumpkins for this year’s decor.
Step 1:
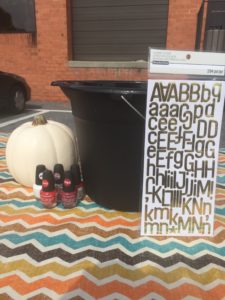
Gather your materials! You will need:
- A bucket
- WARM water (nail polish will sink in cold water)
- Various colors of nail polish
- A pumpkin (or pumpkins, plastic or real works)
- Toothpicks for swirling
- A glass to put your pumpkin on to dry
- Sticker letters
Step 2:
Pour warm water into the bucket. Make sure the water is warm to the touch but not too hot you cannot keep your finger in it. Begin pouring the nail polish gently onto the top of the water. Get creative! Use as many or as little colors as you’d like, and swirl them together with a toothpick for a super marbled effect.
Step 3:
Grab your pumpkin by the stem. Depending on where you’d like the design to be, dip that part of the pumpkin in the water first. In our video, you will see the bottom and one side of the pumpkin get the most marbling, you can choose how you’d like it to look based on that.
Step 4:
Admire your beautifully marbled pumpkin! Place the pumpkin upside down onto a glass so the nail polish can dry. We recommend allowing to dry for at least 1 hour. Once the polish has dried, you can place sticker letters or decorations onto the pumpkins. Be careful where you place them as removing the sticker may also take off the nail polish.
Show us your marbled pumpkins! Use the hashtag #GFLMarbledPumpkin on Instagram or Facebook for a chance to get your pumpkin shared from our pages!